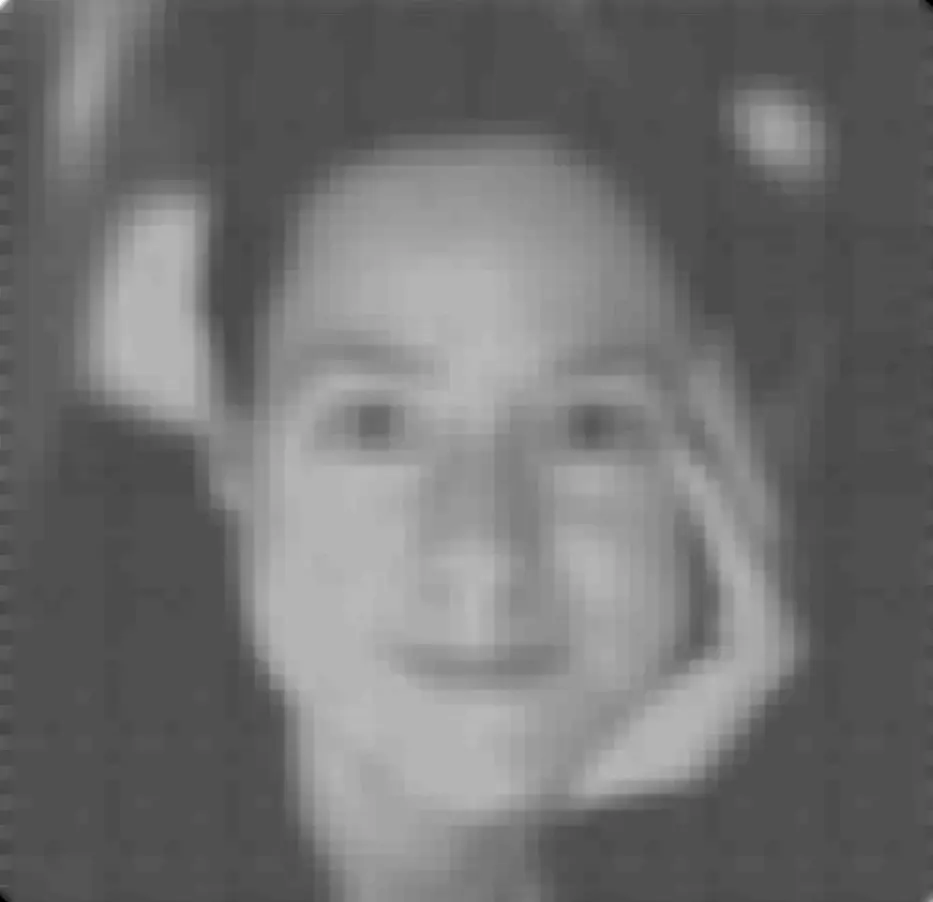
Recovered image, attempt 1:
I used exact 7x7 box blur to remove high-frequency contents, then median blur and contrast increase… Very basic but pretty good for a FOSS Android app.
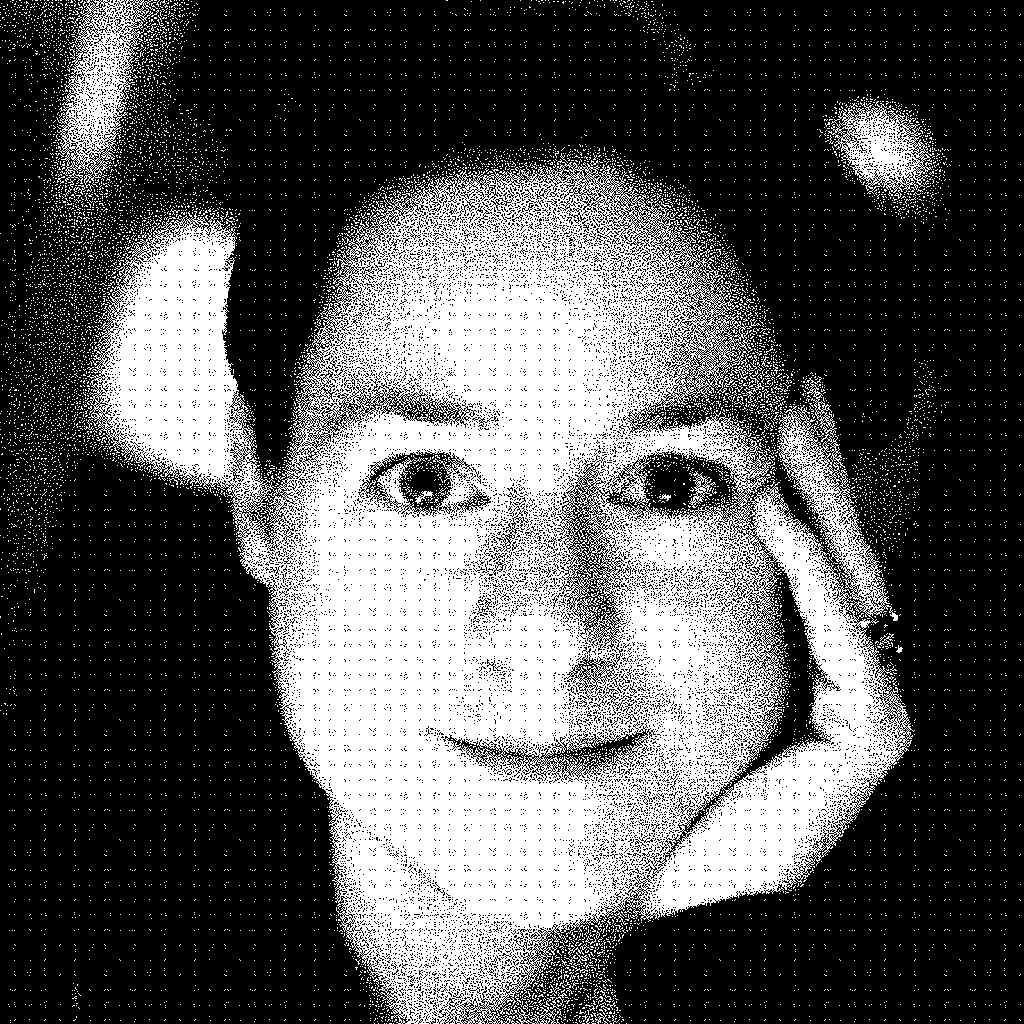
Now that I’m on my computer and got GIMP, a single filter can almost recover the original image from behind the 90%-opacity checkerboard, which turns out is actually 1bpp (unfortunately, the JPEG noise, especially around tile edges, remains). The filter in question is a basic lightness curve, with steps at 13 (5%), 128 (50%) and 243 (95%):
_|¯¯¯¯¯¯¯¯¯|_________|¯
The result is:
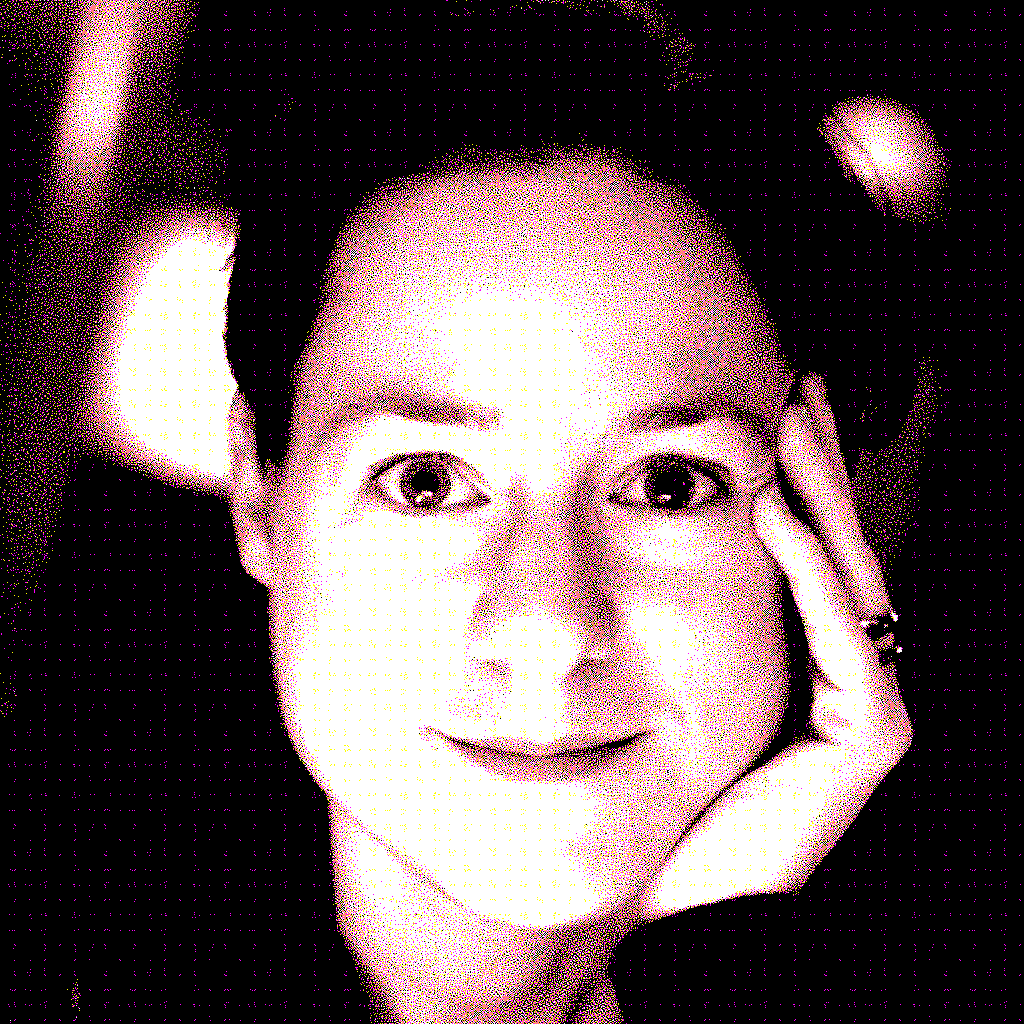
Here’s the original dithered image BTW, and the source photograph:
Here’s a comparison of my recovery, limited by JPEG noise, as opposed to what could be recovered if the author used a PNG (could have reached <100 kB losslessly, as opposed to lossy >200 kB!):
🟪 = false white; 🟨 = false black; as a result, the original image is in the green channel and the noisy one in the blue channel, and reddish tint highlights error
Edit: text below is from before I knew there is detail within the squares, I’d thought they were flat color, the space saving is not that substantial with that in mind (a 16x16 lossless as 4-color indexed PNG saves only cca 67 % (shown below), or about 50 % as a reasonably lossy JPEG):
There’s so much JPEG artifacting in the original. All of it, and I mean all of it, could have been avoided, at much smaller file size, by using tile size of 16 instead of 15 (ImageMagick’s default pattern:checkerboard).
(Yes, the sides are off but that’s because I’m on the phone and don’t have my usual software. Still, the tiles align with JPEG’s 8x8 blocks (usually 16x16 for chroma but that’s blank here) so they’re all clean, at ⅛ the file size.)


Recovered image, attempt 1:
I used exact 7x7 box blur to remove high-frequency contents, then median blur and contrast increase… Very basic but pretty good for a FOSS Android app.
Now that I’m on my computer and got GIMP, a single filter can almost recover the original image from behind the 90%-opacity checkerboard, which turns out is actually 1bpp (unfortunately, the JPEG noise, especially around tile edges, remains). The filter in question is a basic lightness curve, with steps at 13 (5%), 128 (50%) and 243 (95%):
_|¯¯¯¯¯¯¯¯¯|_________|¯
The result is:
Here’s the original dithered image BTW, and the source photograph:


Source & author’s notes
Here’s a comparison of my recovery, limited by JPEG noise, as opposed to what could be recovered if the author used a PNG (could have reached <100 kB losslessly, as opposed to lossy >200 kB!):
🟪 = false white; 🟨 = false black; as a result, the original image is in the green channel and the noisy one in the blue channel, and reddish tint highlights error
Edit: text below is from before I knew there is detail within the squares, I’d thought they were flat color, the space saving is not that substantial with that in mind (a 16x16 lossless as 4-color indexed PNG saves only cca 67 % (shown below), or about 50 % as a reasonably lossy JPEG):

There’s so much JPEG artifacting in the original. All of it, and I mean all of it, could have been avoided, at much smaller file size, by using tile size of 16 instead of 15 (ImageMagick’s default
pattern:checkerboard).(Yes, the sides are off but that’s because I’m on the phone and don’t have my usual software. Still, the tiles align with JPEG’s 8x8 blocks (usually 16x16 for chroma but that’s blank here) so they’re all clean, at ⅛ the file size.)